It’s our tradition and a way to really bring us into the moment and excitement of the holidays… our annual DIY Advent Calendar.
We make a different one every year, sometimes simple, sometimes more complex; but one this is certain, our family loves it! We love a good countdown and a way to bring the excitement of the season into each day in December.
This year, we decided to go a little simple and rustic and I love the finished result!
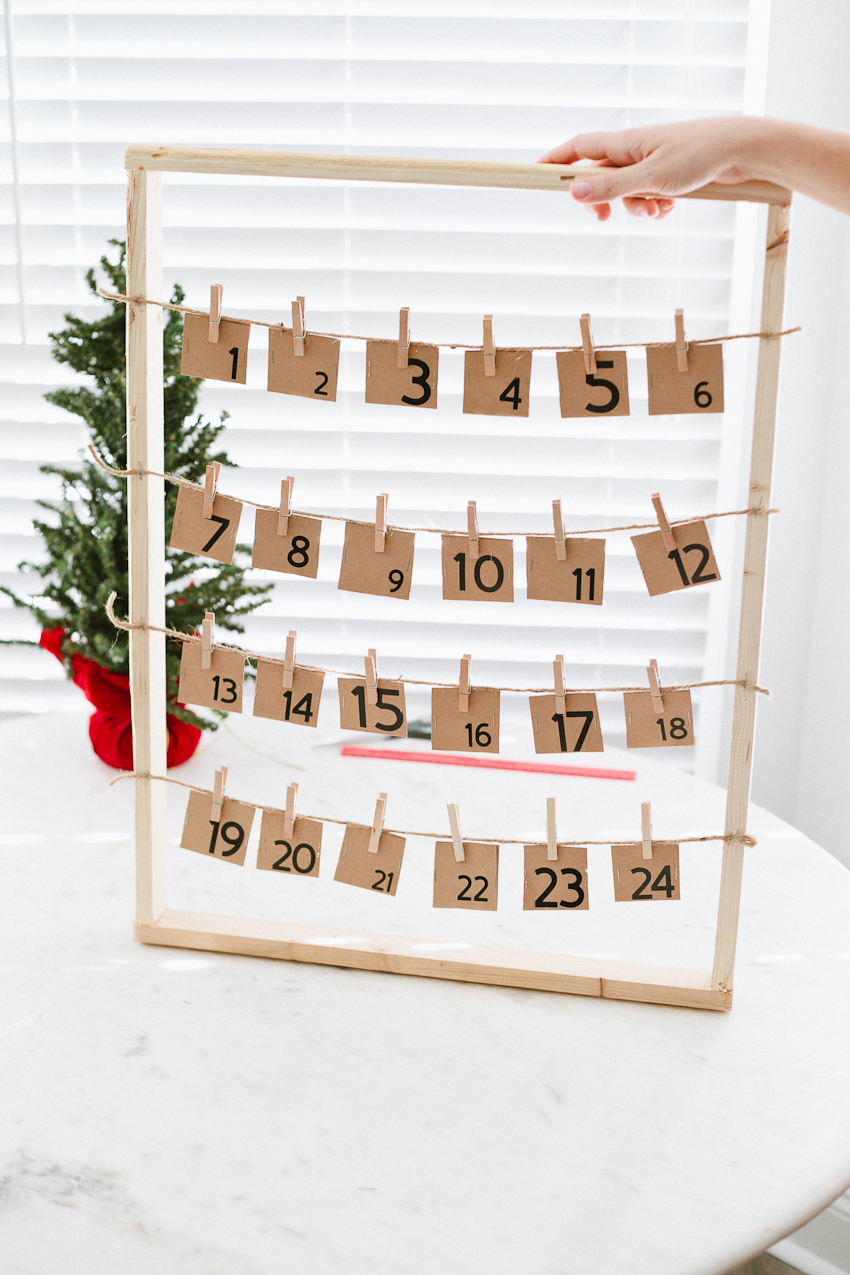
To start the project, create a simple frame. The great thing is that you can customize and make it whatever size you’d like want. We had some leftover 1”x2” strips of wood from our DIY Farmhouse Sign to make a 24”x18” frame. Using wood glue and finish nails, create the rectangle that will be your frame.
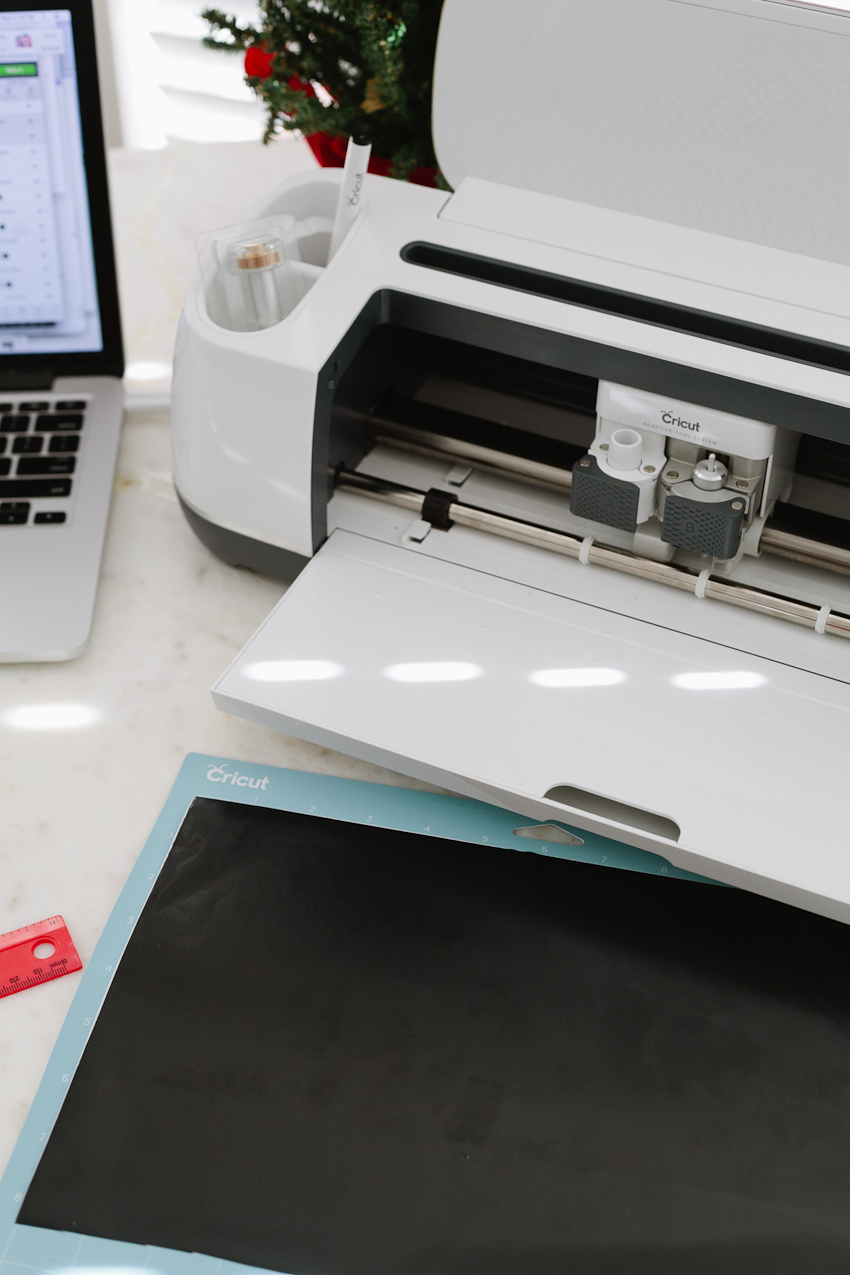
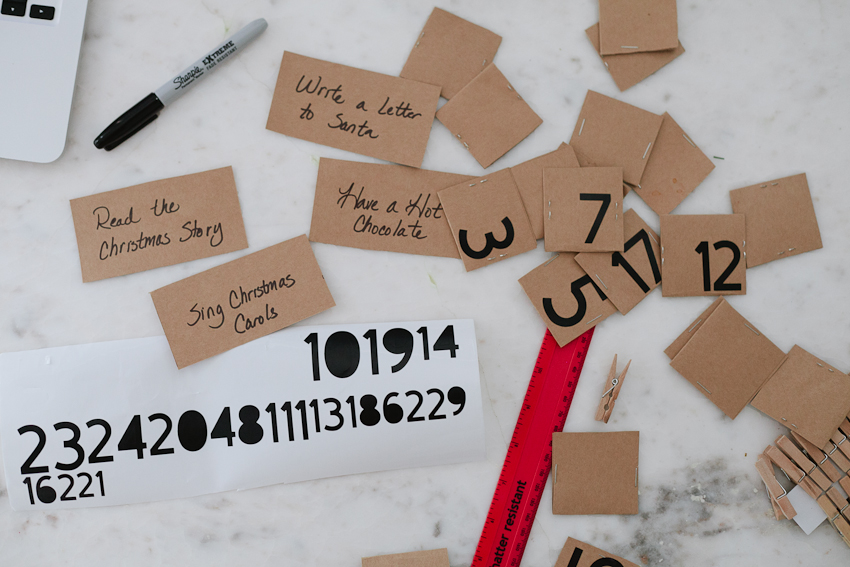
Using card stock, cut into 2”x4” rectangles. This will become a pocket or envelope that can be used to hold a small note or coin, or before it’s folded, it’s the perfect place to write a special daily message. Fold the papers in half and staple each side to create a square. Squares should end up approximately 2”x2”. With the help of the Cricut we used vinyl to cut numbers for each of our envelopes, which makes the finished product have a much cleaner appearance.


The next step is to staple four rows of twine to our frame. After each envelope is numbered and ready, use mini clothespins to hang on each line of twine.


It’s really a quick and easy way to create something special for the family and makes a big impact in your space too! Just turn on a Christmas movie, whip up a mug of hot chocolate and you’ve got a quiet project for yourself as you near the holiday.