


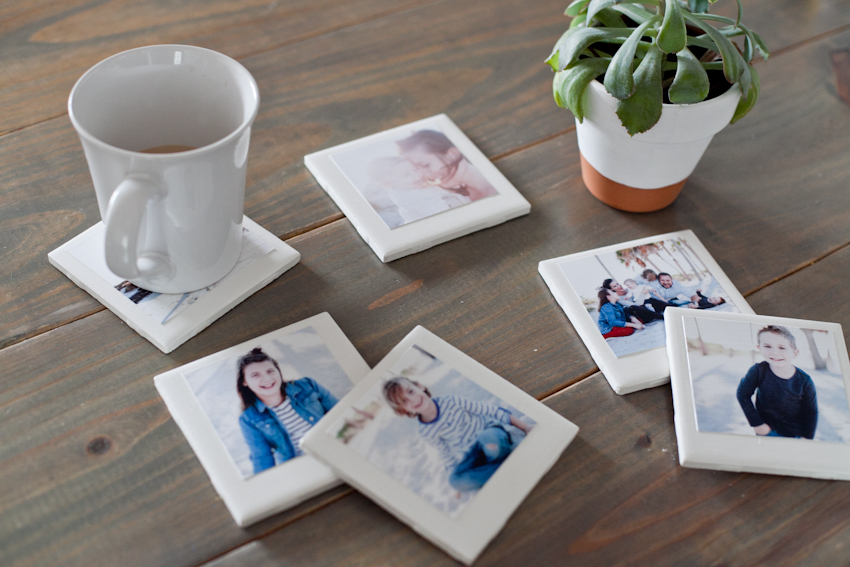
If you know me at all, you know I love to celebrate… and what’s a better way to celebrate National Photo Month than with a DIY your entire family will use and love! My phone is a device that, even more so than talking or texting, is used to store photos. Seriously, I spend so much time snapping them, editing them, posting them, and then they are usually never to be seen again. For National Photo Month, we decided to remedy the situation and I’m SO happy with the results!
So, gather up your supplies and round up your favorite photos because you’ll want to make these DIY Polaroid Photo Coasters as well! They’re perfect for your home or to use as gifts for relative, friends, teachers… you name it!
DIY Photo Coasters
Materials Needed:
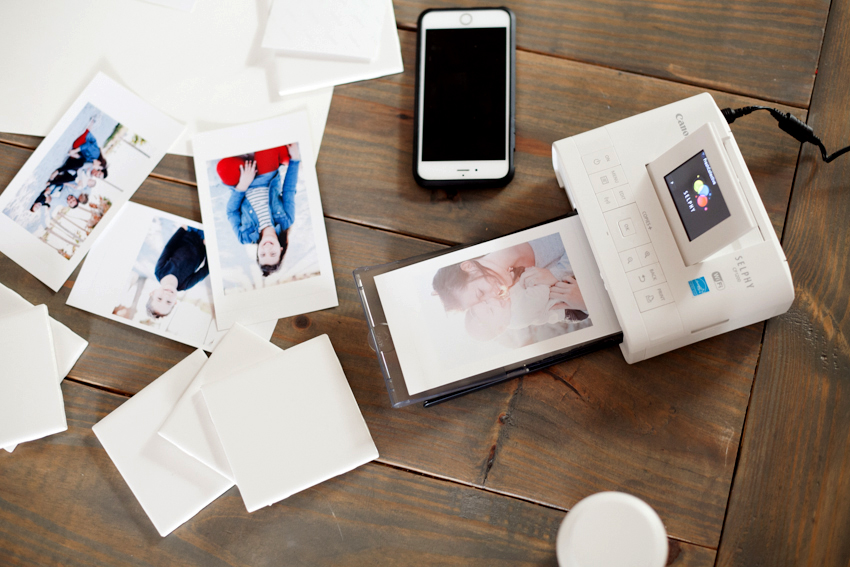
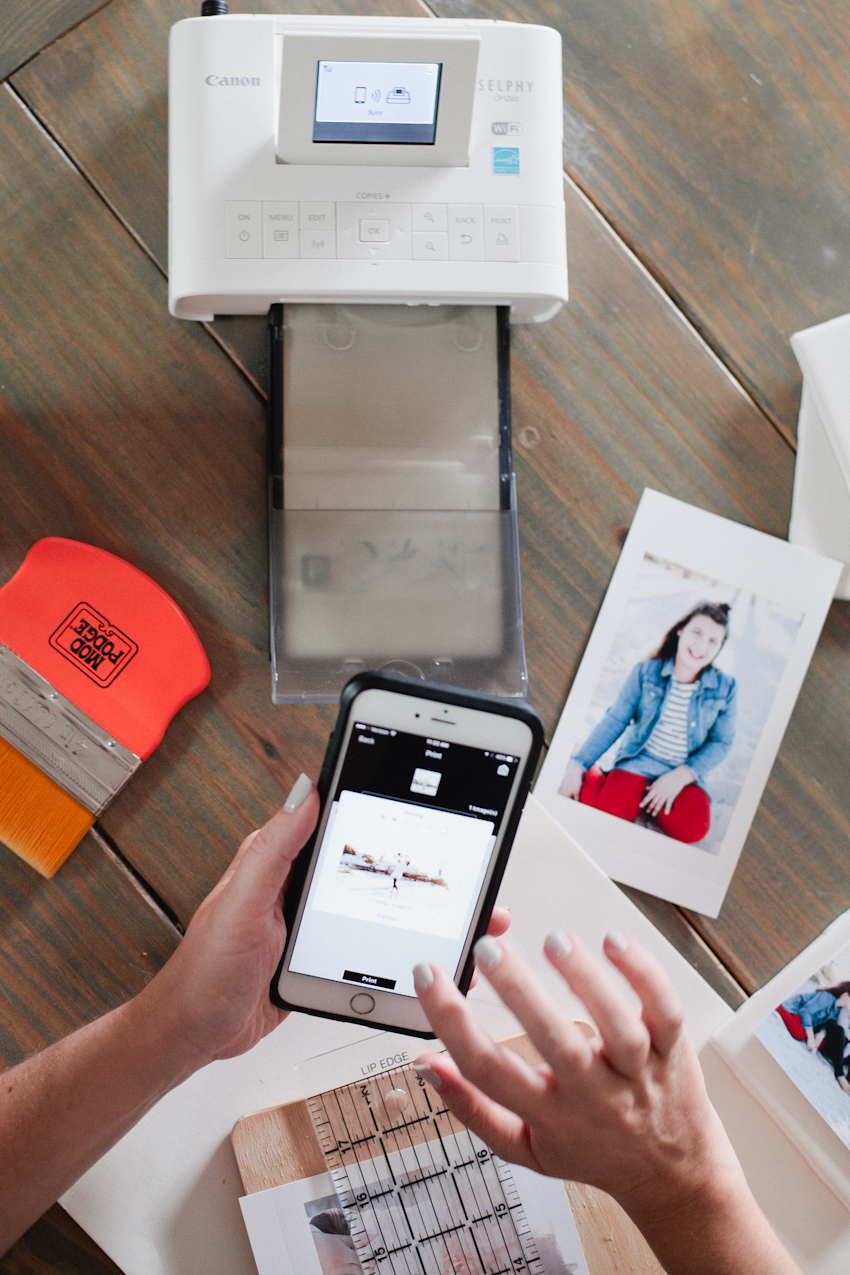
- Photos – I used the Canon Selphy printer to print photos wireless from my cell phone.
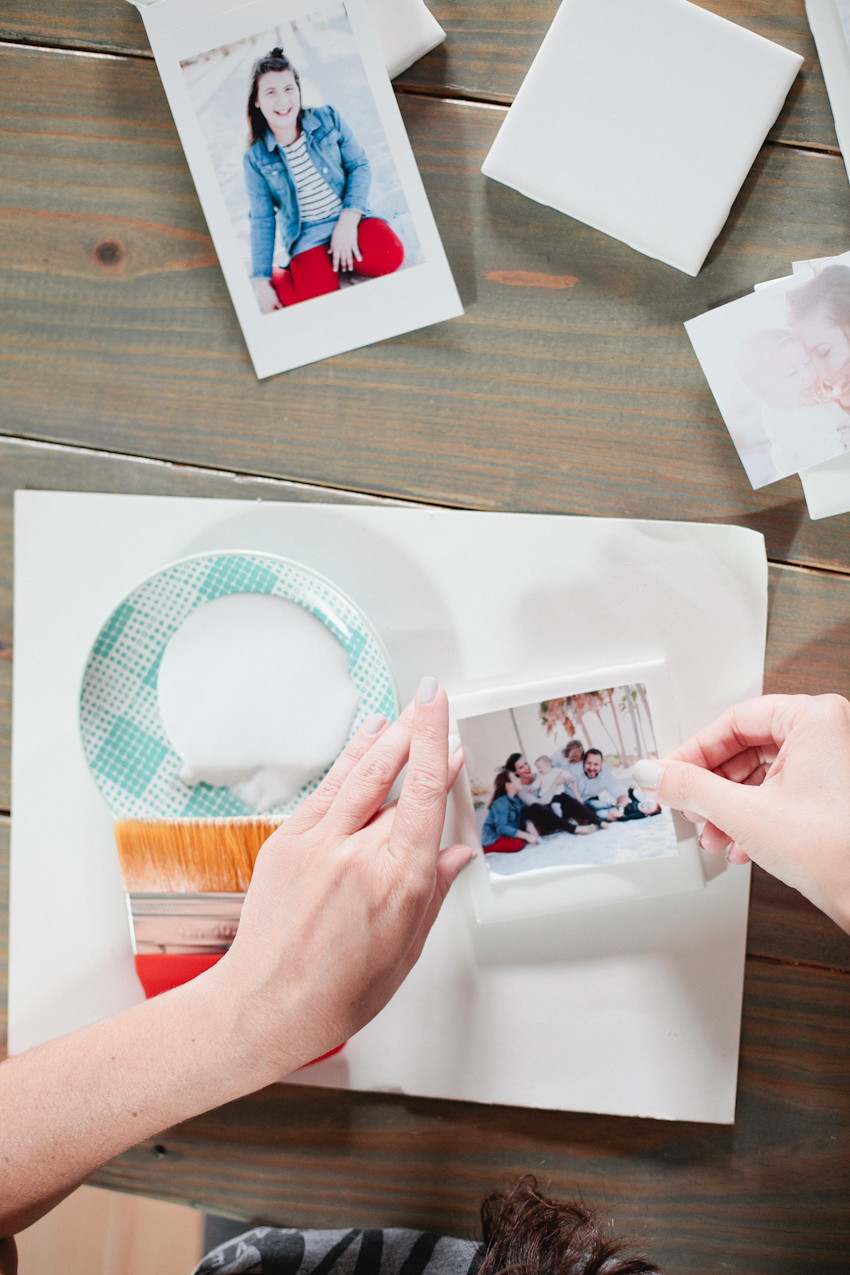
- 4” x 4” white tiles (one for each photo/coaster)
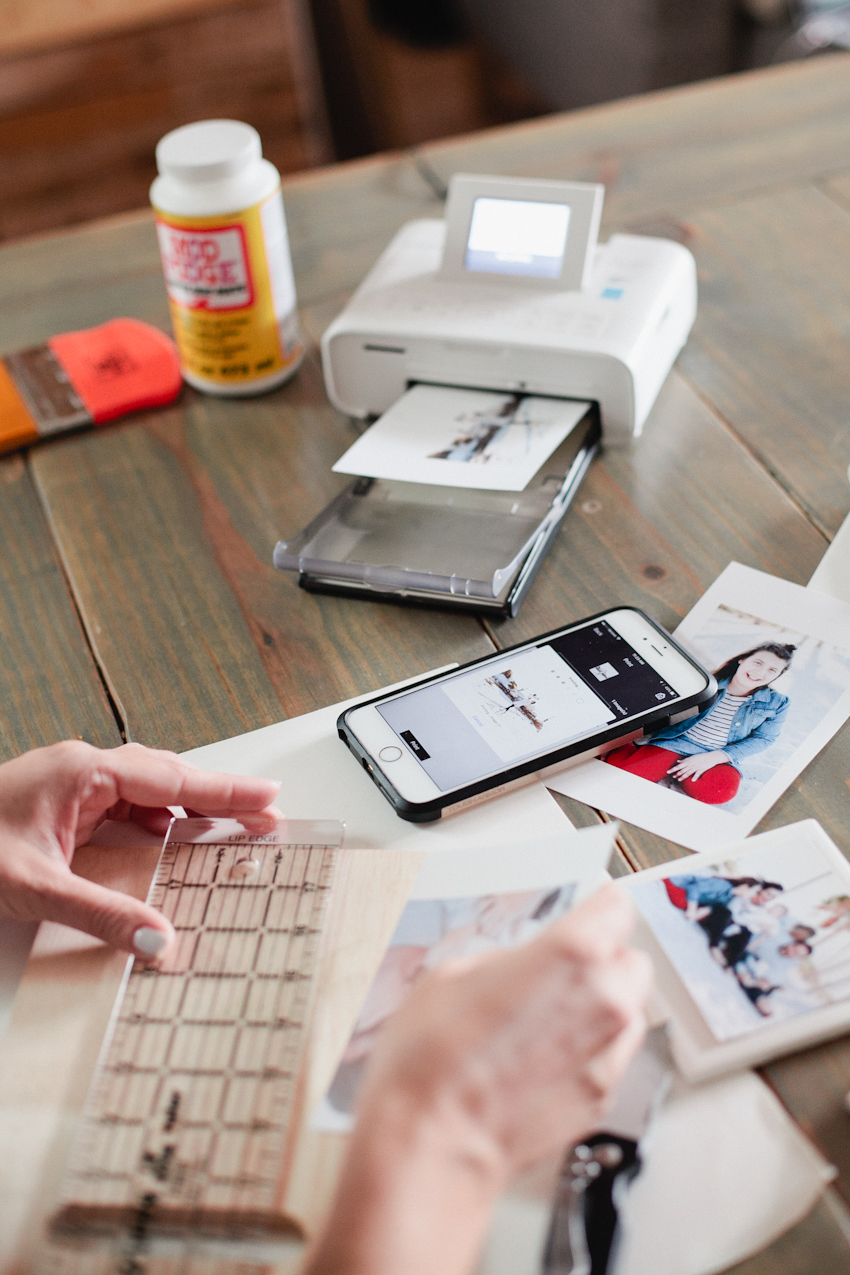
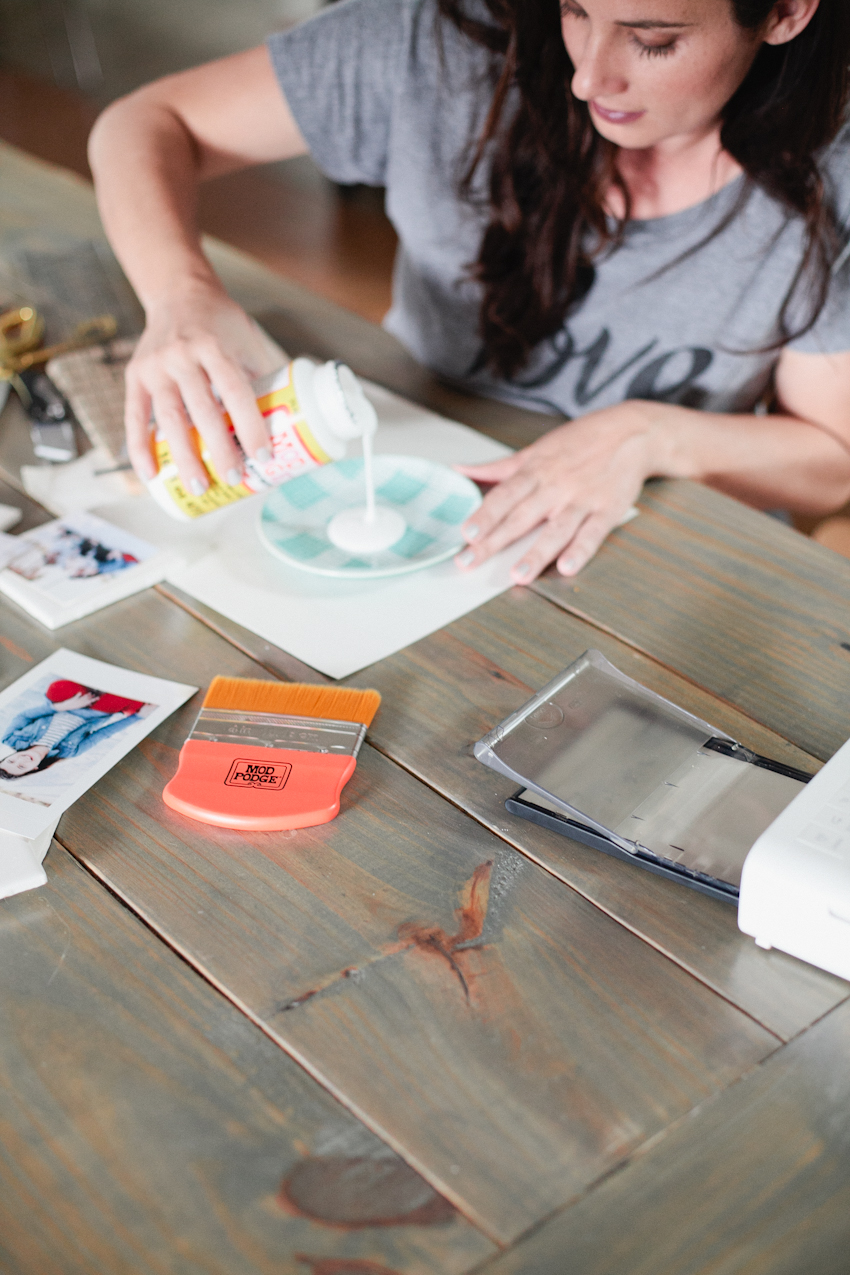
- Mod Podge
- Mod Podge brush
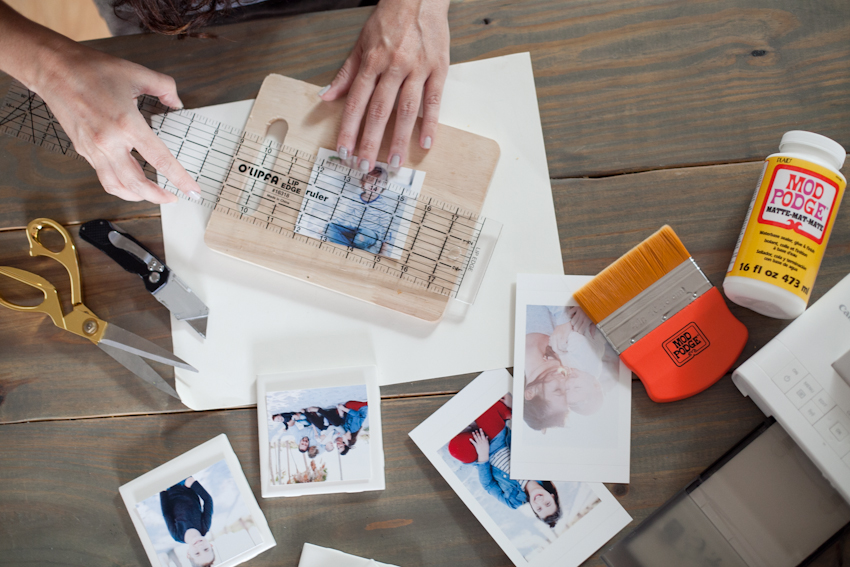
- Scissors or a ruler and craft knife
Directions:
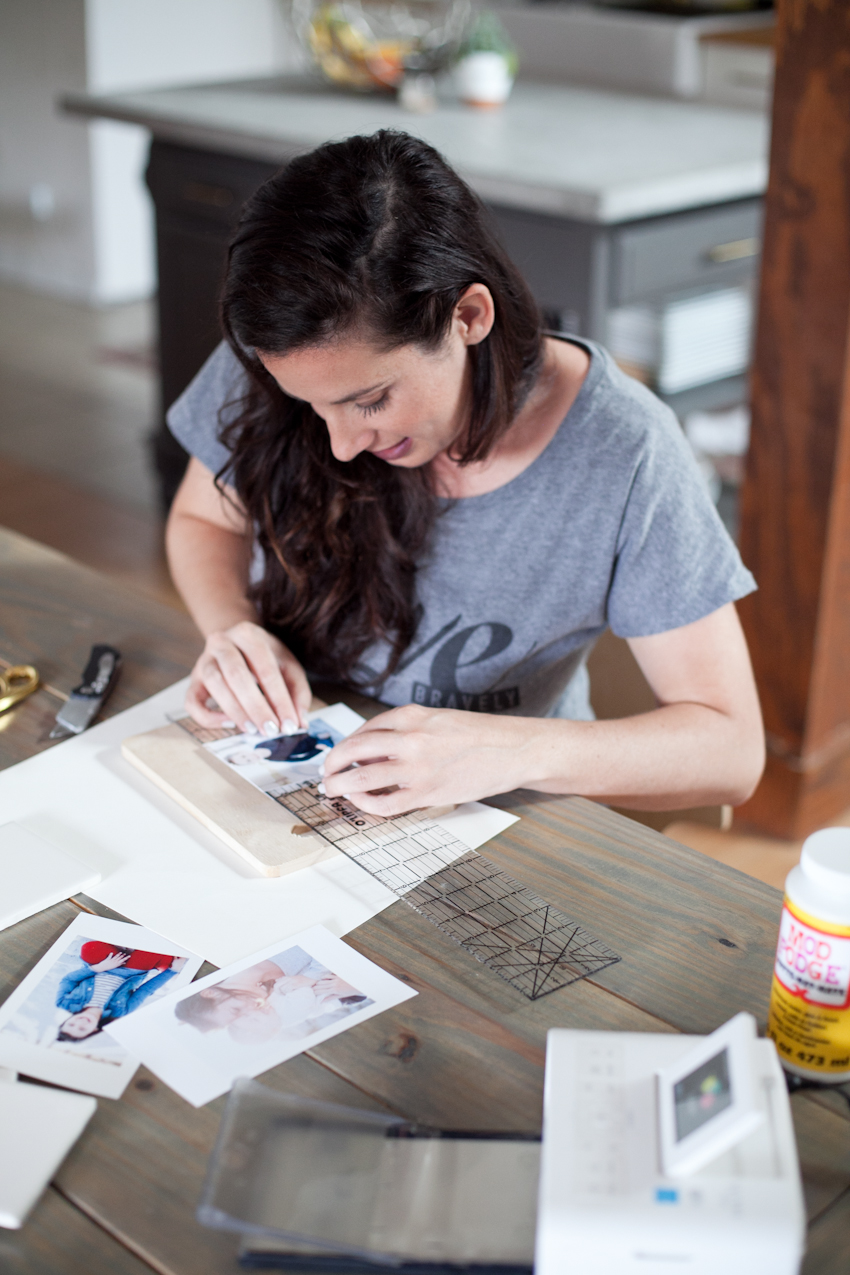
1. Cut your photos down to about 3.5” wide and 3” tall. This will allow you to leave a white border around the edges with more room at the bottom (to look like a polaroid).
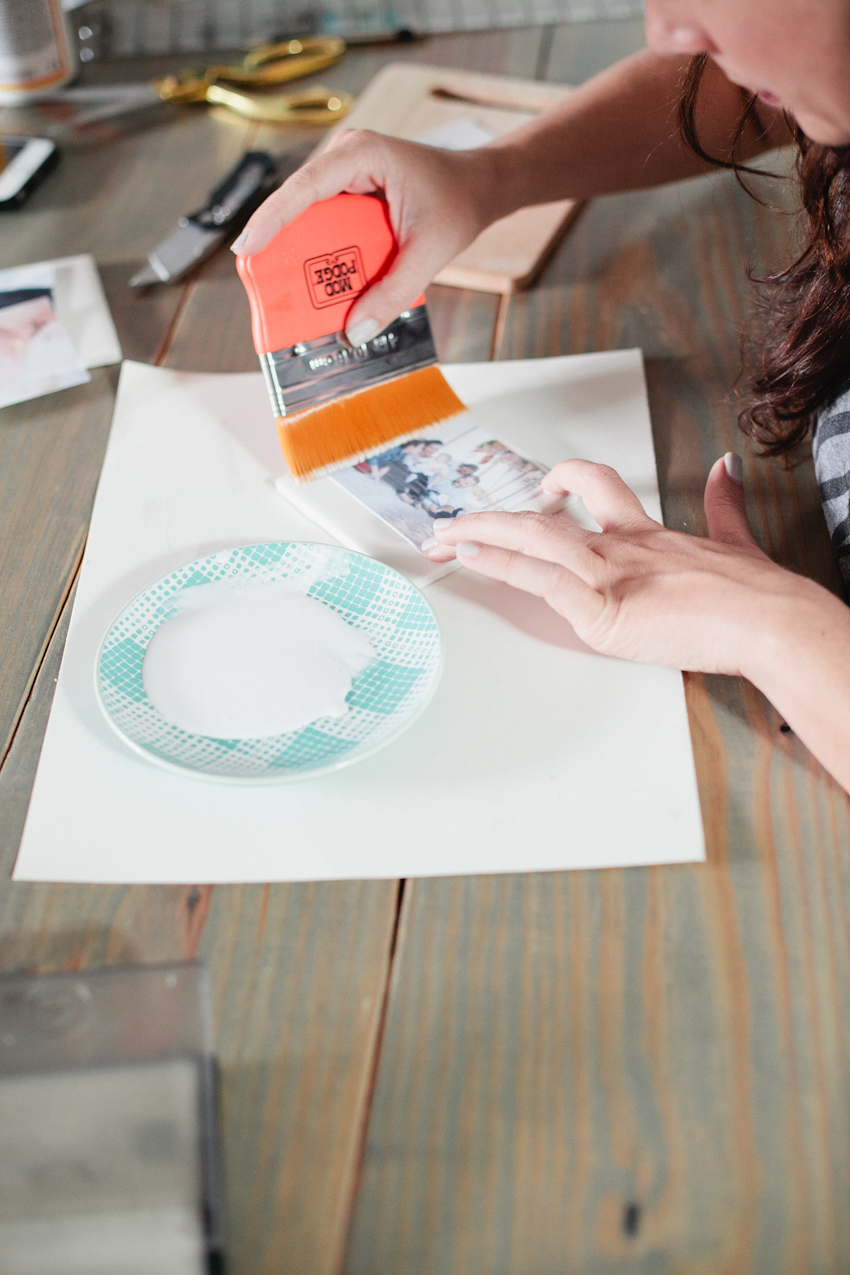
2. Using basic white ceramic tiles (usually around 16¢ each), paint a coat of Mod Podge onto the glossy part of the tile and lay photo flat where you want it. Let each tile dry for a bit while you move on to the next tile.
3. Brush a coat of Mod Podge over the entire photo/tile.
4. Let dry thoroughly and then enjoy!
5. To make sure the coasters stay waterproofed and sealed, feel free to add a coat of clear lacquer over the top. So far, I haven’t needed this extra protection, but I may just add it on later.
6. For another optional touch, you can use a Sharpie or other marker to write on the bottom white space of the “polaroid” to give it even more of an authentic look! If you do this step, I would do it before the lacquer.
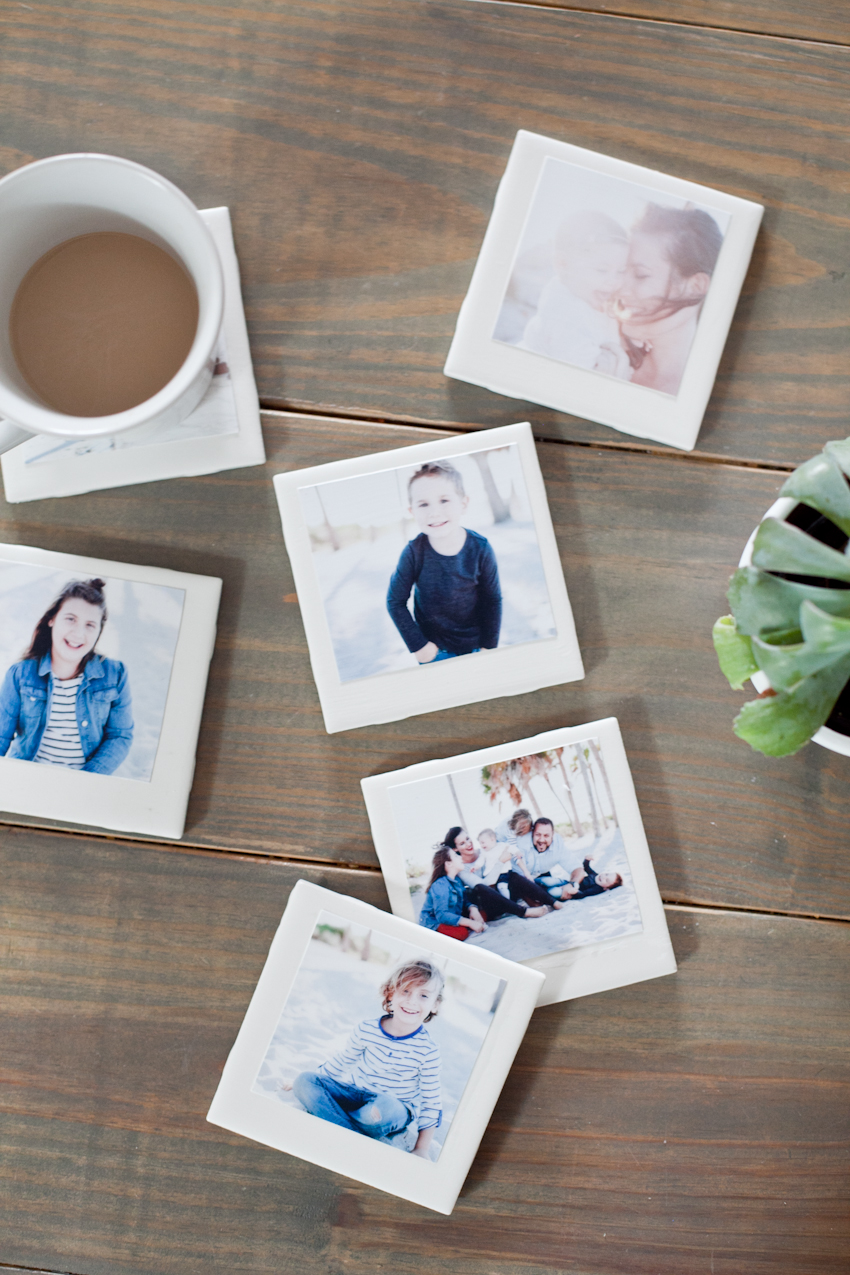
Enjoy using or gifting your new, personalized coasters or display them somewhere proudly! Are you a fan of DIY projects? What has been a favorite of yours that you’ve done?